S5-Series Float Valve - Installation and Maintenance
THE SEries 5 VALVEs INCLUDES
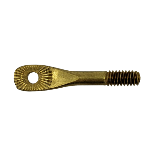
2 brass float rods (2”, 5 ¾”)
Float rod weight
Float rod stop gasket (to keep weight in place when using longer brass rods)
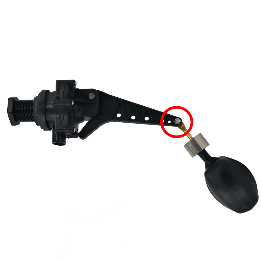
Wing nut, bolt, star washer (to attach brass float rod to valve arm)
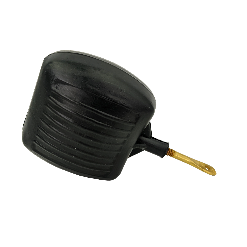
Plastic Float 4”
Valve Unit (including filter and diaphragm)
Adapter or fitting to fit your inlet application
VALVE ASSEMBLY
The valve comes with two different size brass float rods to customize the length to suit your application.
Choose the brass float rod that meets your installation needs and insert into the plastic float. The float rods are easily interchanged by unscrewing the float rod from the plastic float. The larger rods have a rubber stop gasket to prevent the rod weight from sliding down the brass float rod.
The smaller float rod does not require this rubber stop gasket.
Other optional longer float rods are available to better suit your application if needed.
After your desired float rod selection and insertion into the plastic float, connect the other end of the brass float rod to the valve arm by using the wing nut, bolt, and star washer. The star washer goes between the valve rod and the brass float rod.
The S5-Series valve comes with an inlet adapter of your choosing permanently attached to the valve body that coincides with the model number.
With the S5-050, attempting to remove this adapter will cause a fail point in this connection which in-turn may result in leakage and is not covered under warranty. To clean the filer, see maintenance below.
VALVE INSTALLATION
Prior to installation ensure the feed lines are flushed and free of debris.
Make sure that you chose the correct model and adapter/fitting to match your feed line diameter.
Using Teflon tape, turn the assembly into the feed line and hand tighten making sure the outlet is facing down into the tank.
Adjust the brass rod to the desired tank level.
MAINTENANCE: S5-050 and S5- HD Series
Valve
If the valve is not operating properly
Check the valve rod adjustment to assure proper tank level is maintained.
Check diaphragm and filter condition
Turn off the feed line.
For the S5-050 valve (1/2″ version), remove the six stainless steel screws holding the valve bonnet in place and remove bonnet. The valve does not detach from the 1/2″ black valve adapter.
For the S5 – HD Series, unscrew the valve from the 1-1/2″ or 2″ adapter to expose the diaphragm/filter
Remove diaphragm assembly and check for debris buildup and flush with clean water if debris is present.
Check diaphragm assembly for signs of rupture. If ruptured replace diaphragm assembly. (part# S5-100D)
For the S5-050 valve, using the six stainless screws re-assemble the valve and return to service making sure the float is adjusted properly.
For the S5 – HD Series of valves, simply reattach the valve to the 1-1/2″ or 2″ black adapter (based upon your inlet application)